PAT PILCHER’s simple and effective method of upgrading PS5 storage for the PSVR2 is literally a game-changer.
I’ve been bingeing on games for the PSVR2 on my PS5 for some time. As much fun as this is (and oh boy is it fun!), there’s a serious downside in terms of the sheer amount of storage gobbled up by these titles. Having finally completely run out of space, I bit the bullet and upgraded my PS5’s storage. Here’s how I did it.
It’s not all that difficult to do, nor is it all that expensive. Provided you are both careful and methodical, you’ll end up with a tonne of space on your PS5. That said, you’ll be opening up your PS5 and they won’t be held responsible should any damage happen (which is very unlikely).
Would you like to support our mission to bring intelligence, insight and great writing to entertainment journalism? Help to pay for the coffee that keeps our brains working and fingers typing just for you. Witchdoctor, entertainment for grownups. Riveting writing on music, tech, hi-fi, music, film, TV and other cool stuff. Your one-off (or monthly) $5 or $10 donation will support Witchdoctor.co.nz. and help us keep producing quality content. It’s really easy to donate, just click the ‘Become a supporter’ button below.
Before you start, back up all your games and data. Upgrading your PS5’s memory won’t wipe your games, but just in case, backing up is definitely a good idea.
- Back up your PS5 data before starting.
- Connect a USB drive to your PS5 console’s USB port. I used Western Digital’s My Passport SSD drive which is an SSD drive, making it both super-quick and reliable.
- Make sure it is formatted as exFAT storage (otherwise the PS5 won’t let you do any backups).
- Go to the home screen and select Settings > System. Then select System Software > Back Up and Restore > Back Up Your PS5.
- Select the USB drive you want to save your backup data to and select the type of data you want to back up, and then select Next. A pop-up asking for a file name will appear. Enter a description of the backup data and then select Back Up.
- Your console should then restart and begin to back up its data. Once complete, your PS5 will restart. (This isn’t a quick process, so allow 4-5 hours at least)
- Expand your storage!
Before you start, make sure you have the following:
- Your PS5 is updated to the latest version.
- A small Phillips screwdriver
- A flat-head screwdriver
- A dish to put lose screws in
- You’ve read these instructions through before starting
You will also of course need a new (and larger) SSD. Making sure you have a compatible SSD is key. Most SSD manufacturers with PS5-compatible SSDs will advertise that their drives are PS5-compatible. Just in case though, look for An M.2 NVMe SSD, that supports PCIe Gen4 protocol. The SSD should have at least 250GB, but no more than 4TB capacity. The SSD must have a heatsink attached too.
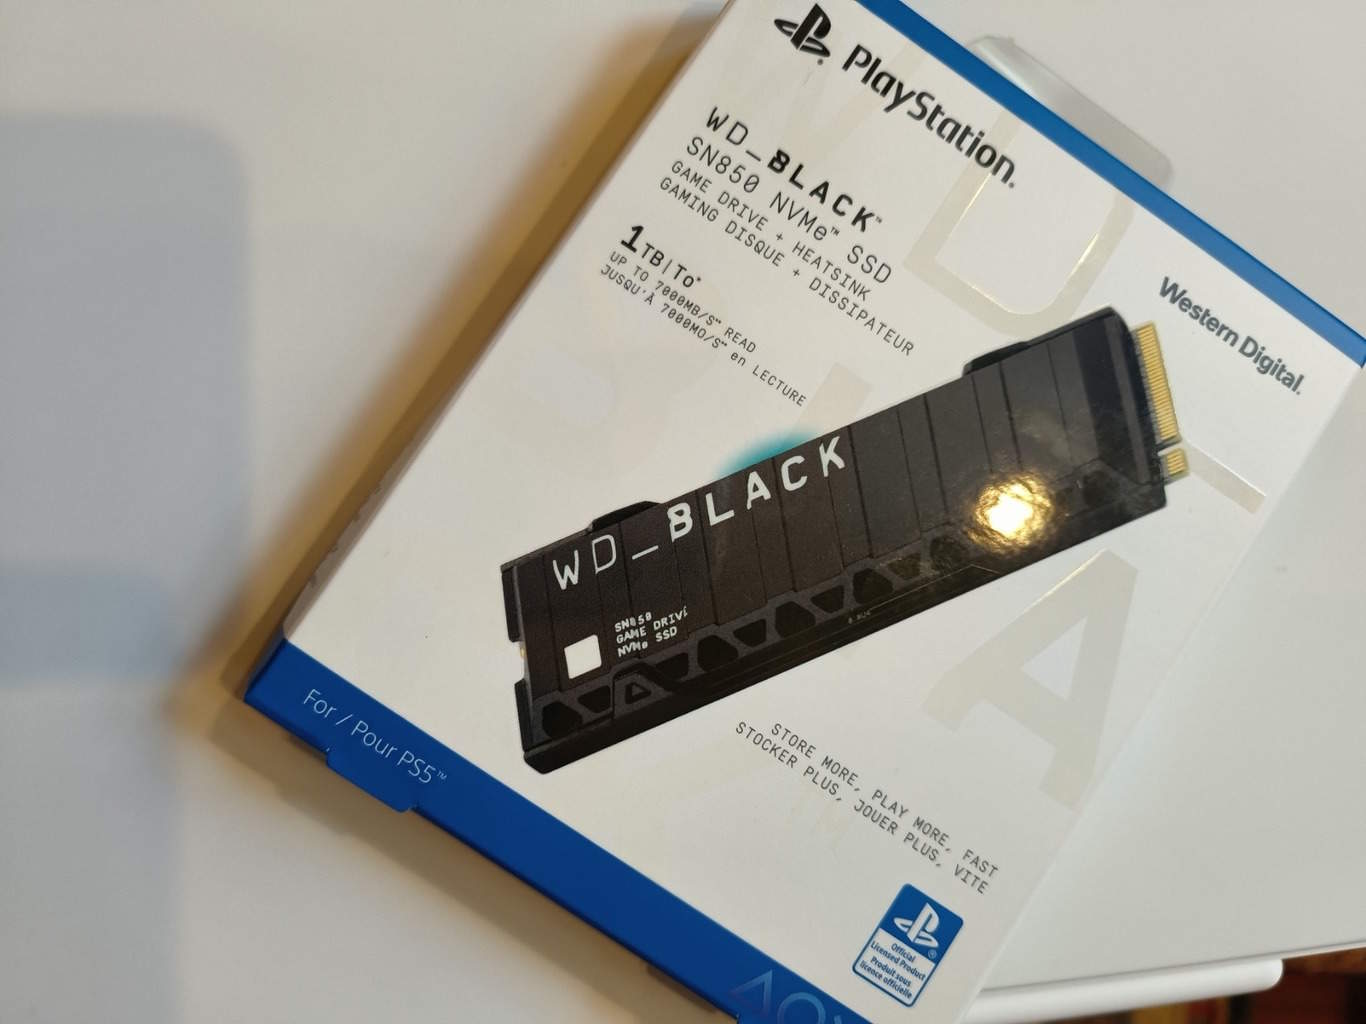
M.2 NVMe SSDs look like the love child of a stick of PC RAM and an XXL USB stick. Adding further confusion into the mix, they can also come in multiple sizes. The PS5 will work with 2230, 2242, 2260, 2280, and 22110 sizes. Make sure the NVMe SSD you buy has one of these sizes printed in its box.
I chose Western Digital’s WD BlackSN850 NVMe SSD as it’s designed specifically for the PS5, and besides, you can’t go wrong with WD. It works like a charm
Next, you’ll need to get your PS5 ready. Do this:
- Shut down your PS5 console, Power it off – don’t leave it in Rest Mode. No LED lights on the console should be illuminated. It is vital to get this right as tinkering around with your PS5’s innards while it is powered up will permanently damage it.
- Once your console is completely powered down unplug any cables connected to the PS5. This should include the HDMI cable, the power cable, and network cable.
- Next Remove its stand (if you are not using the stand, ignore this step). It can be removed with the flat-head screwdriver. Place the screw in the dish so its easy to find later.
- With the stand removed, lay out the PS5 on a flat surface, making sure the PlayStation logo is on its underside.
Once your PS5 is powered down, disconnected and laid out, you’ll need to remove its cover. Here’s how:
- The faceplate you want to remove is the bottom plate (that has the Blu-ray drive slot in it). Confusingly, there are two cooling fans, one on each side, but only one side has the expansion slot. Taking the wrong faceplate off only to find no expansion cover is a rookie mistake.
- The faceplate is held in place with small hooks, so you’ll need to lift and shift to remove it.
- Before you start, ensure its power port is facing you.
- Once your PS5 is oriented the right way around, grab the top left corner and the bottom right corner of its faceplate.
- Now the fun part: lift the front-right corner and push to the left. It should make a click pop noise and free up, allowing you to remove it.
With the faceplate removed, you’ll see both a cooling fan and the metal NVME SSD expansion slot just below the fan. This is where you add the extra storage, here’s how:
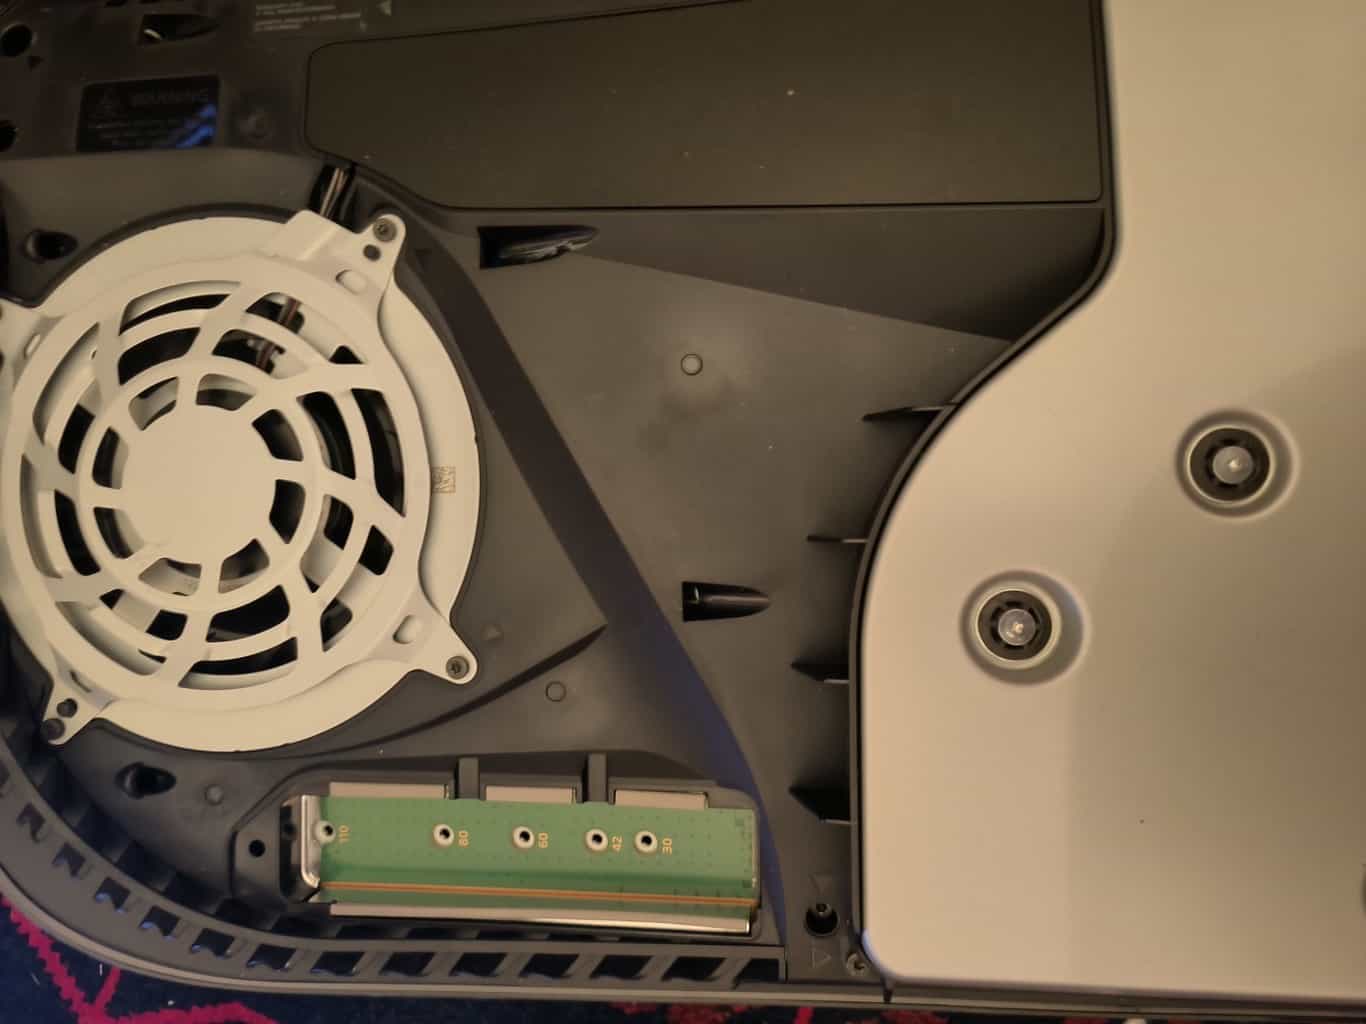
- Using the Phillips screwdriver, remove the screw holding down the expansion slot cover. Be sure to set it aside. Note that it has PlayStation controller symbols on it (this will become important in a future step).
- Lift out the Expansion Slot cover, setting it aside.
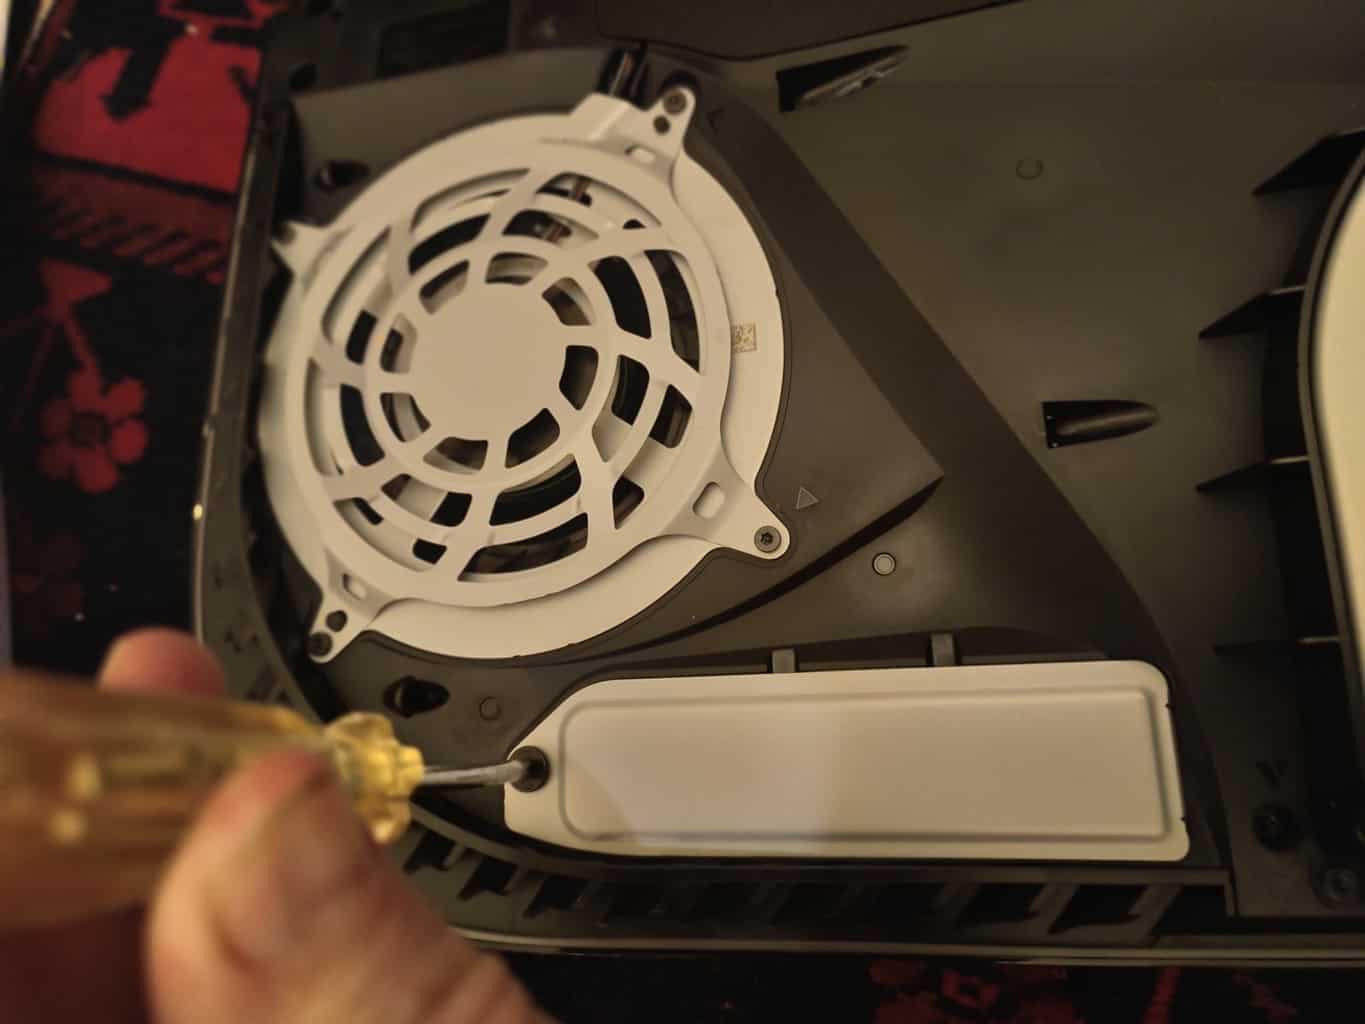
- Now the expansion slot is exposed, a small, metal spacer will be visible. Using the Phillips screwdriver, remove the screw holding the spacer in. Put the screw and spacer aside in the dish so they can be easily found later.
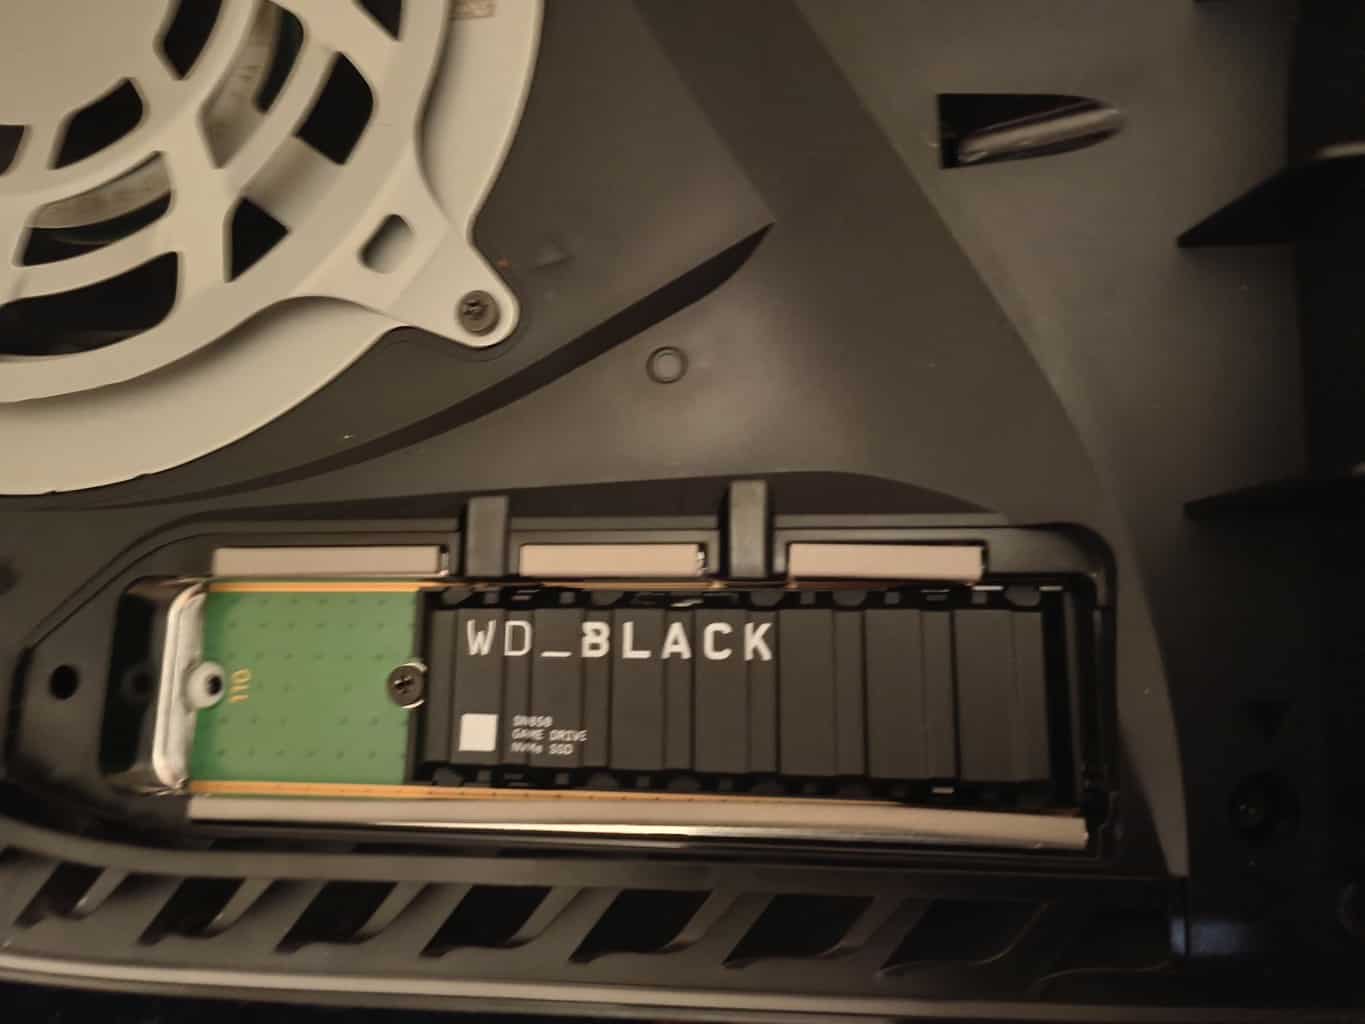
- On the opposite side of the screw/spacer, there’s the slot that you’ll the NVMe SSD plugs into.
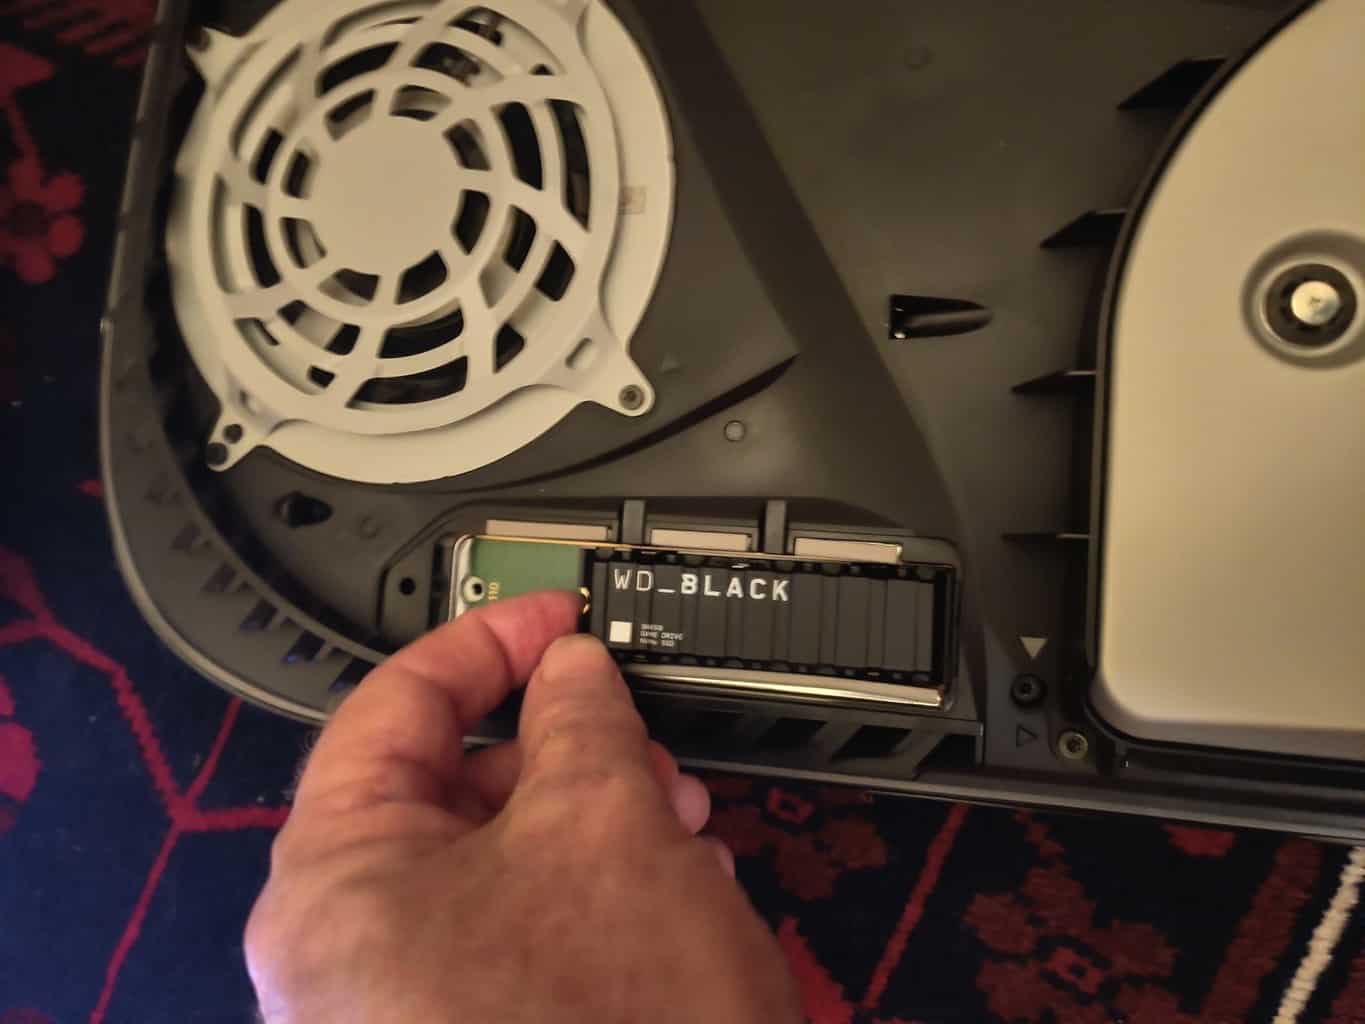
- Line up the pins of your NVMe SSD with the slot, making sure your SSD is around the right way.
- Gently lower and insert your SSD into the slot, pushing it in so its pins go into the expansion slot.
- The SSD should be firmly inserted and the notch on its rear should be directly over a spacer hole.
- Using the screw that was holding the metal spacer (not the screw with PlayStation symbols on it), screw it into the hole that the NVME SSD aligns with, so your SSD is secured and snugly locked in place.
That’s the hard part over and done with, now to put everything back together:
- Re-attach the Expansion Slot cover by inserting it and lowering it down.
- Grab the screw with PlayStation symbols on it, and use it to screw in and secure the Expansion Slot cover.
- Sliding the PS5 faceplate back into place. You may need to apply some firm (but gentle) pressure to secure it into place. You’ll hear a “click” once it’s snugly in place.
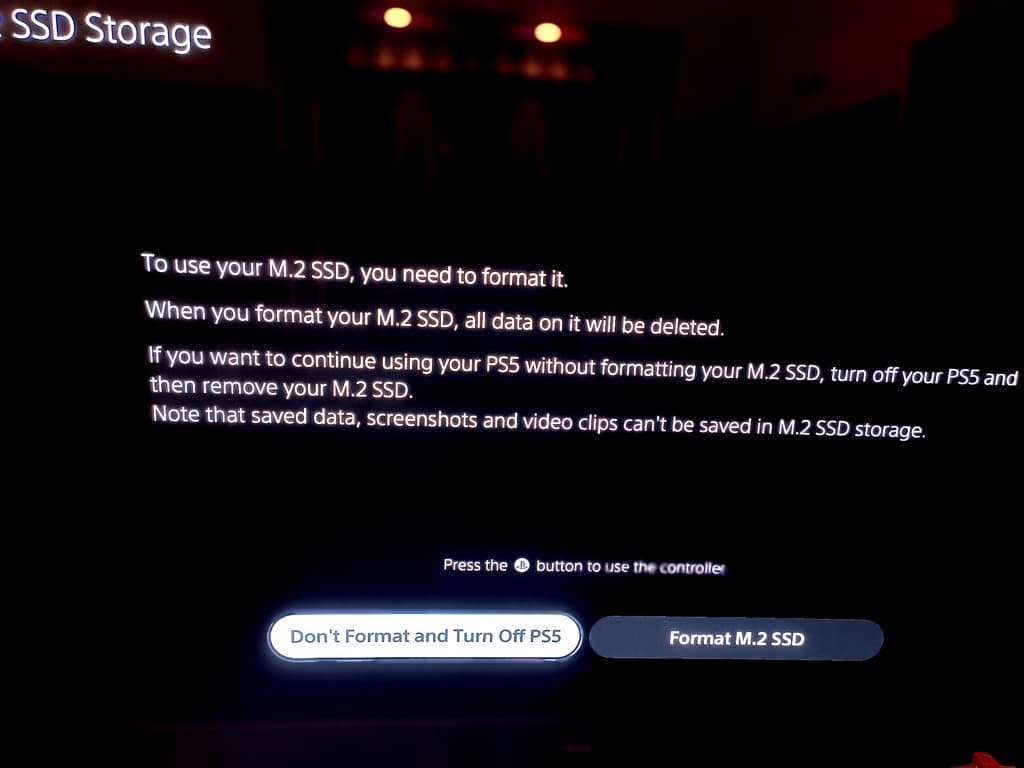
- Plug all the cables back into your PS5 and power it up. You should see a screen asking if you want to format your new SSD (select Yes, and format your SSD).
You should now have a tonne of new space to save games to. If you did a backup, you can restore it (but you probably won’t need to) once your SSD is formatted. Do this before doing any updates as the current system software version must be the same (or newer) than the version on the PS5 console when the backup was made. Do the following:
- Re-Connect your USB drive to your PS5 console. Select Settings > System. Select System Software > Back Up and Restore > Restore PS5.
- Select your USB drive. Select the data you want to restore. Select Restore > Yes.
- Your console restarts and restore begins. When restore is complete, your console restarts again and you return to the home screen.
Note: when restoring your PS5 console, Sharing and Offline Play gets turned off. You may want to tweak those settings to avoid losing access to any subscriptions and content.
Having expanded your storage, you can also set games to save to the more roomy SSD instead of the console’s cramped storage via Settings> Storage>Installation Location. Games can also be moved to your SSD using Settings>Storage>Console Storage. Simply select the games you want to move and they’ll copy across. Enjoy!